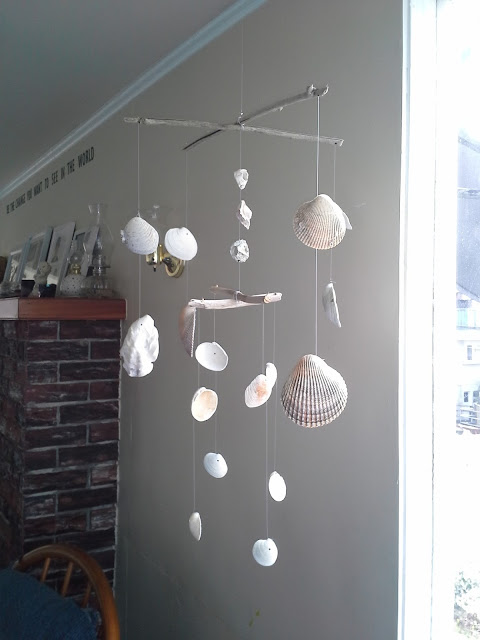
Living in Southeast Alaska, the ocean and all of it's wonders are a big part of life. The beaches here aren't the kind with soft sand and warm waves, these are rugged Alaskan beaches, covered with rocks and barnacles, where the water (even in the summer) is only ever one temperature...COLD!
Especially since moving to Ketchikan, where the ocean is visible from almost every place in town, the beach has been one of our favorite places to be.
Especially since moving to Ketchikan, where the ocean is visible from almost every place in town, the beach has been one of our favorite places to be.
Summer or Winter, in swim shorts or Xtra-Tuffs, the boys love to run around in the surf, searching for creatures and filling their buckets with shells, rocks, and sea glass.
As you can imagine we've acquired quite the collection over the years. Last Spring, I finally came across a project that looked like a great way to use up our stock of shells, a seashell mobile!
This turned out so great, the boy's decided they needed some for their room too
Some bright colors and a little glitter made these look
really fun and unique!
really fun and unique!
This is a super simple, inexpensive craft, especially if you have a beach handy! No worries though, if sea level is far below you, most craft stores have a wide variety of shells to choose from :)
Here's what you'll need:
Drill
Drill bit
Shell assortment
Sticks
Monofilament (or other hanging material)
The first step is to pick which shells you want to use and drill the holes. I found that the smaller bits work better and that breaking a few is inevitable, so pick some of your least favorite for practice.
I used the 3/32 size bit from this set by Master Mechanic
If you are wanting a natural look, skip ahead to the next step, if not, then it's time to decorate!
Grab some paint, glitter, ribbon, rhinestones, anything you have to make your shells look awesome!
The boys also decorated their sticks by coloring them with permanent markers.
Now, if you're making a tiered mobile, you want to tie your sticks together.
I drilled holes in the end of my sticks next, which is optional, depending on how you want to hang your shells. I opted for attaching them with monofilament, small beads, and metal crimps.
If you are tying the shells on, don't worry about drilling the sticks
Once your shells are dry, it's time to string them up!
Have Fun!!


