I've always felt such a strong connection to certain things from my childhood, special toys I played with, movies I watched or books I read. There's something so magical about being small and experiencing something for the first time, playing all afternoon and being so completely absorbed in your own little world.
One of my earliest memories is from Kindergarten and playing with this fake blueberry bush they had for Alaska studies week. I could pick the fake blueberries and fill my basket up, then re-attach them and start all over. Who's to say whether this is the reason or not but, to this day, I absolutely love picking berries! Being out in the sun, the birds chirping, surrounded by green, just spending hours filling up my bucket.
The version linked is a tree painted onto the wall, which I considered, but it wasn't quite warm enough to open the windows for painting inside and when I want to do a project I have to do it NOW!
(Click here to see the original tree and the rest of her amazing playroom!)
Since making our tree I have
also thought that one of the removable giant wall sticker trees like the boys have in their room would work too. I haven't tried it myself, but since the pull on the Velcro isn't very hard, it shouldn't pull the tree away from the wall...I think, if you've tried this and it worked please let me know!
Giant wall decals like the one pictured next to Carter's bed are widely available online.
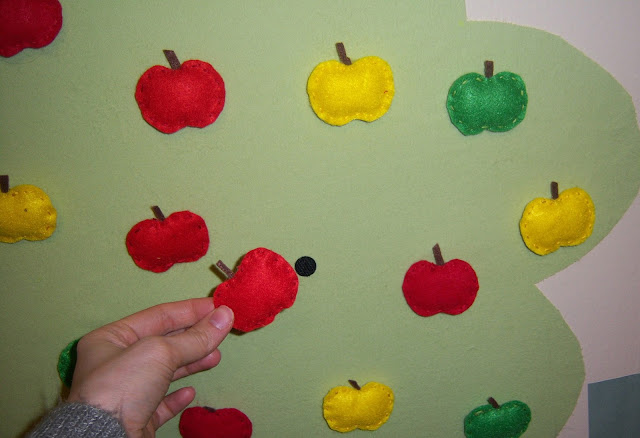
Here is our version of the apple picking tree
It's cut from a big sheet of flannel and stuck to the wall with Elmer's spray adhesive.
I love that it is tactile on so many levels, not only the scratchy Velcro and the fuzzy felt apples, but the tree itself is soft and interesting to the touch.
So I will start with how I made the tree, then move onto the apples.
Here's what you need for the tree:
Fabric
Spray Adhesive
Marker
Scissors
I went with a basic brown trunk and green leaves, but feel free to use whatever fabric you have, bright pink and blue or orange polka dots or even plaid would be super fun!
Lay out your fabric and use a sharpie to draw your shapes, then cut out.
Find and mark where it will go and prepare an area for spraying the glue, I cover about a 4 ft. space with old newspaper.
A note before you start spraying the glue, a partner is a BIG help here. I was able to do it myself, but for a permanent bond the material has to be pressed to the wall in less than 15 seconds and with a big piece this is no easy feat. My tree top kept folding over and sticking to itself, I had to reapply adhesive twice and believe me, a few choice words were muttered in the process ;)
Spray your trunk first and quickly press to the wall. Next spray the top and quickly press on the top of the trunk. Allow to set for an hour.
If you will be adding apples to your tree, the next step is to add Velcro dots. You want 1 dot per apple, so figure out how many apples you'll be making beforehand. The felt will only stick to the scratchy Velcro, so only use those dots and save the soft ones for a future project.
Now on to the apples!
I used the apple template from Family Fun that was part of a felt cornucopia craft they came out with a few years ago. Feel free to make your own design if that's your thing, I've attached the link to the templates below though for anyone who is interested. Print and use just the apple on page 3, or go with any other of the fun fruits or vegetables they have, who says you can't have an eggplant tree?
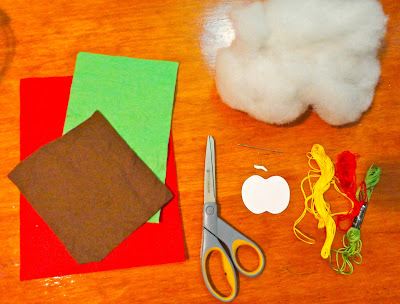
Here's what you'll need for this part:
Felt sheets
Scissors
Embroidery Floss
Needle
Stuffing
Using the template (or cutting freehand), cut 2 sides of felt for each apple and 1 small piece of brown for the stem. Put the sides together with the stem in between and sew along the edges, making sure to put one stitch through the stem to keep it in place. About halfway through, fill with stuffing, then sew closed and tie off. Repeat as many times as needed to get the number of apples you want. I went with twenty apples in red, green and yellow. While it seems like a lot of work, after I'd done the prep, I was able to get all the sewing done in one evening while watching a movie.
And that's it! Stick them up, find a small basket, and let the kids start picking!

Not only does the tree look super cute, it has also been an awesome learning resource. Carter has been doing preschool at home this year and using the tree has been a fun way to master counting 1-20. Looking forward to next year when we'll start with some apple addition!
Have Fun!!


No comments:
Post a Comment